Wednesday, May 30, 2012

Red, White and Blueberry Muffins

I love May. There are so many good things that happen this time of year, like school getting out, flowers blooming, the weather finally getting really nice... I could go on and on. Even though I love summer, I am always a little sad to see May pass into June. There have been so many things to make May particularly special and memorable this year. To name a couple, my husband and I both graduated from college and we celebrated our first year of marriage! 

Since Memorial Day has just passed, I decided to share a picture that my mom sent me last weekend. Her dad, my grandpa, served during World War II and is now buried with my grandma at Fort McPherson National Cemetery. My parents had the chance to go out there on Sunday and I wish so badly that I could have been with them! I am so grateful for the men and women that have served our country throughout history, and I can't even imagine how drastically different our lives would be without the sacrifices they gave and give still on a daily basis.  


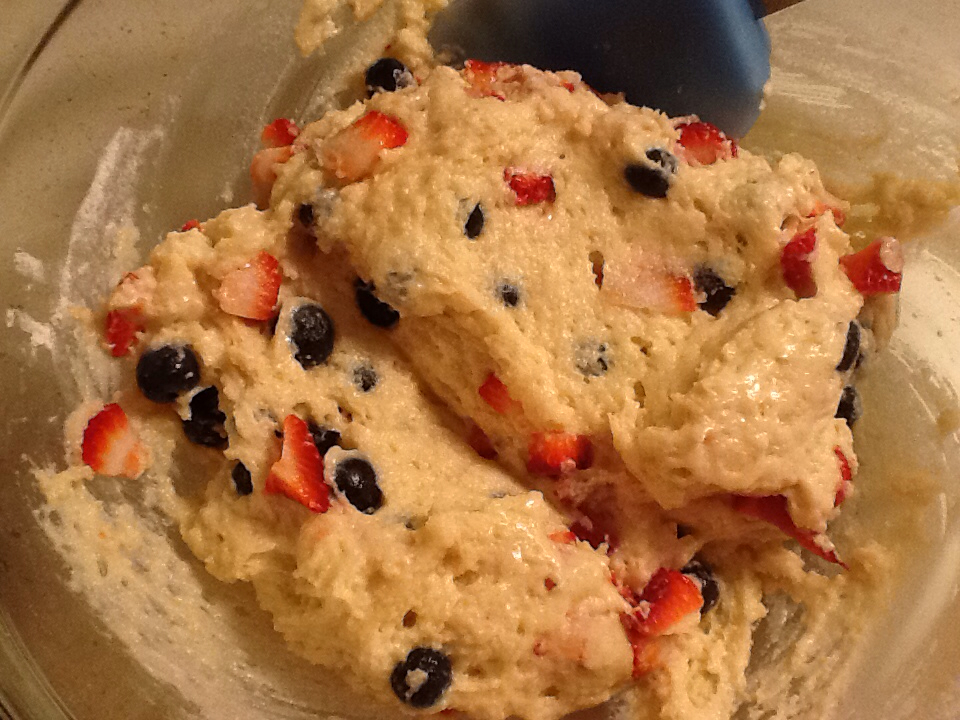
Well I was wanting to make something that had a patriotic theme and meshed well with this time of year. I've been buying lots of berries lately, and after visiting the farmer's market here in town on Sunday, I was inspired to make these wonderful muffins because I tried a slice of a bakery's Red, White and Blueberry bread that they make every year around this time. The bread was really good, and the muffins really were wonderful! I think I am in love with this strawberry/blueberry combination. I happened to have both strawberries and blueberries on Monday morning, and then discovered a container of sour cream in my fridge. And so the Red, White and Blueberry Muffin was born. The batter was beautiful and thick, and made exactly 12 muffins. I felt like I was maybe filling my muffin liners too full (I didn't want to get out my other pan for just 1 or 2 muffins) but after they baked, I realized they were the perfect size. I'm going to have to make these again soon, since we devoured them all by the time Tuesday rolled around!


Red, White and Blueberry Muffins
Makes 12 muffins

1 1/2 cups flour
1 1/2 teaspoons baking powder
1/2 teaspoon salt
1/2 teaspoon baking soda
1/2 cup sugar
1 egg
1/2 heaping cup sour cream
1/4 cup oil
2 teaspoons vanilla
1/2 to 3/4 cup blueberries, fresh or frozen
1/2 to 3/4 cup strawberries, chopped
sugar, for sprinkling

1. Preheat oven to 350°. Grease a muffin pan or line with paper liners and set aside.

2. In a medium bowl, combine the flour, baking powder, baking soda, salt, and sugar. Whisk together then set aside.

3. In another bowl, beat the egg with a whisk, then add the sour cream, oil, and vanilla and stir to combine.

4. Add the dry ingredients into the wet ingredients all at once and gently mix by hand until all the ingredients are incorporated. Fold in the strawberries and the blueberries.

5. Fill the muffin pan with the batter and bake in the oven for 20 to 25 minutes until the muffins are lightly brown and a toothpick inserted in the center comes out clean.

6. Allow the muffins to cool for several minutes, then remove to a cooling rack. Serve warm with butter. Enjoy!


Oh, and I added a picture of me and my hubby from my cousin's graduation a few weeks ago. I hope all of you are enjoying this time of year as much as we are!


Thursday, May 24, 2012

Chocolate Pudding

Another one of those staples growing up was chocolate pudding. And I mean real chocolate pudding, not the instant stuff from a box. Chocolate pudding has always been my favorite kind of pudding because that's what Grandma made, and I didn't really know there was anything else (kind of like my viewpoint on cinnamon rolls and grape jelly). I remember Grandma making this before lunch in the summer, then she would make us wait until after lunch to eat it- one of the greatest forms of torture, I was sure. But Grandma knew what she was doing, and all us grand-kids would eat all of our lunch then politely wait for everyone to be done so that we could finally have dessert. Oh and let me tell you it was always worth the wait! Grandma would also make real whipped cream to put on top, so we had warm pudding and the cold whipped cream. There was always a couple of us who probably ended up with more whipped cream than pudding, but after all, that is the way it's best!

This also happens to be the filling for my grandma's well-known chocolate pie. All you have to do is cook it a little bit longer, then put it into a pie shell instead of bowls, and you have one amazing chocolate pie! You still have to serve it with really whipped cream however.

Because Grandma always makes her pudding in the microwave, I do too, but if you would rather make it on the stove, you definitely could. You will have to watch it closely to prevent it from burning or scorching.


Chocolate Pudding
Serves 5-6

2 eggs
3 tablespoons flour
3 tablespoons cocoa powder
2/3 cup sugar
Dash salt
2 cups milk
1 tablespoon butter
1 teaspoon vanilla

1. In a large microwave-safe glass bowl, whisk the eggs until completely combined and no streaks remain.

2. Sift together the flour and the cocoa, then add to the eggs along with the sugar, the milk, and the salt. Whisk until everything is thoroughly combined.

3.Place the bowl in the microwave on high for three minutes. After the 3 minutes, stir the pudding with a whisk until smooth, and continue to cook in the microwave in 30 second intervals, stirring with the whisk after each time. When the pudding is very thick, remove the bowl from the microwave. Add the butter and the vanilla and stir to combine.

4. At this point, you can leave the pudding in the large bowl that you cooked it in or you can put it into individual dishes. Allow the pudding to cool a little, then serve with whipped cream. If you like pudding cold, you can make it ahead of time, then refrigerate it until you are ready to eat it (if you can wait that long!). Refrigerate any leftovers. Enjoy!


Sunday, May 20, 2012

Strawberry Cupcakes

I love berries, and let's face it- who doesn't? Strangely enough, however, the most common berry is probably my least favorite. And that is the strawberry, although, I think I am beginning to develop a new liking for them. Since it is spring, they have been on sale just about everywhere, and I have a tough time not buying the little boxes when everything else around them is more expensive and not as ripe. I have been experimenting with strawberries the last few weeks, and some of my new favorite recipes showcase strawberries as the star ingredient, which brings me to these cupcakes.

I wish I would have been keeping a log of the cupcakes I've made thus far in 2012. I actually think that I would hit around the 250 mark, and the year's not even half over! (and all during student teaching, I might add). I made almost 100 in one afternoon a few weeks ago. Needless to say, cupcakes are something I've really enjoyed experimenting with. This strawberry cupcake was the first time that I have ever put fresh fruit in a cupcake. More than once I felt like I was making muffins or something and I even called them muffins at least once. They are definitely cupcakes, however, and the texture of the cake is light with just the right amount of fruit and strawberry flavor. I brought them to a party, and they went over very well. I even had one lady tell me they were the best cupcakes that she had ever had! As a cook, that is always something I love to hear.

I made a simple vanilla butter cream frosting to go with these, but I really think several different things would pair with it nicely. If I made them again, I might even do just whipped cream. I have added the frosting recipe I used, but feel free to experiment or use your own favorite frosting recipe.


Strawberry Cupcakes
Makes about 34 to 36

For the cupcakes
2 1/4 cups all-purpose flour
1/2 cup cake flour
1 tablespoon baking powder
3/4 teaspoon salt
1 cup (2 sticks) butter, at room temperature
2 1/4 cups sugar
1 1/2 teaspoon vanilla extract
3 large eggs plus 1 egg white
2 tablespoons strawberry jam
1 cup milk
2 cups finely chopped fresh strawberries

For the frosting
1/2 cup (1 stick) butter, softened
4 cups powdered sugar
dash salt
1/3 whipping cream or milk
1 teaspoon vanilla extract

Note: If you are using salted butter, reduce the salt to 1/2 teaspoon for the cupcakes.

1. For the cupcakes, begin by preheating the oven to 350°. Line two cupcake pans with paper liners and set aside.

2. In a medium bowl, combine the flours, baking powder, and salt. Whisk to blend and set aside. In a large bowl, combine the butter, sugar and vanilla. Beat on medium-high speed until light and fluffy, about 3 minutes. Beat in the eggs and the egg white one at a time, mixing well after each addition. Add the strawberry jam, and mix on low to combine. Then add the flour mixture in two additions alternating with the milk, all while continuing to mix on low and until just combined. Gently fold in the strawberries with a rubber spatula.

3. Fill the paper cupcake liners to about 3/4 full. Bake for 25 to 28 minutes, or until the cupcakes are light golden on the top and a toothpick inserted in the center comes out clean. Rotate the pans half way through baking. When the cupcakes are done, allow to cool in the pans for about 5 minutes, then transfer to a wire rack to cool completely.

4. For the frosting, beat the butter for a few seconds until smooth in a large bowl. Add half of the powdered sugar, the salt, cream, and vanilla. Mix on low until incorporated, then add the rest of the powdered sugar. Mix until smooth and creamy. Frost cupcakes with the frosting once they are completely cool. Enjoy!

Cupcakes adapted from Annie's Eats Strawberry cupcakes, and frosting adapted from Hey There Cupcake! by Clare Crespo.

Friday, May 18, 2012

Double Chocolate Biscotti

Someone once told me that Swedish people typically like to dunk something crunchy or hard, like a cookie, in their coffee. Now, I'm not really sure if that is true or not, but one thing I know for certain is that I have quite a bit of Swedish blood in me and I absolutely love dunking things in coffee or tea or just about any liquid that I am drinking. I don't even mind all the soggy crumbs that accumulate in the bottom of the mug. Coincidence? Perhaps, but I like the idea that I do things the way I do because my family members a hundred years ago did the same thing. It's kind of a neat connection. Maybe someday I'll have the chance to visit Sweden and find out first hand.

Anyway, if you also like dunking things, then I hope you have had the chance to make your own biscotti, and if not, then maybe today is your day! I think that biscotti is one of the easiest things to make, and I usually have all the things I need on hand, which is nice because I don't have to make any extra trips to the store. This double chocolate biscotti is a favorite of mine with coffee since it has such a dark chocolate flavor. I did not make mine with the hazelnuts. They do add an extra crunch, but the biscotti are still good without them. If you are feeling creative, it is really easy to dip the little biscotti in some melted chocolate or do a chocolate drizzle on top.


Double Chocolate Biscotti
Makes about 20

1/2 cup plus 1 teaspoon super fine sugar
1 egg
1/4 teaspoon almond or vanilla extract
1 cup all-purpose flour
2 tablespoons unsweetened cocoa powder
1/2 teaspoon baking powder
1/2 ounce unsweetened baking chocolate, finely chopped
2 1/2 ounces bittersweet chocolate, broken into rough pieces
3/4 cup roasted hazelnuts, skinned and roughly chopped (optional)
1 to 2 tablespoons water

1. Preheat the oven to 350°. Line a large baking sheet with baking paper or a baking mat.

2. In a large bowl, beat the sugar, egg, and almond or vanilla extract together until pale and thick, about 30 seconds to 1 minute, using an electric hand mixer. In a separate bowl, combine the remaining ingredients, except the water, with a metal spoon. Gently fold the flour mixture into the egg mixture to form a dough. If the dough is very crumbly, add the water, a little at a time to help moisten and pull the dough together. Remove the dough from the bowl and gently knead it on a lightly floured surface for about 30 seconds. Form a dough log about 10 x 2 inches in size (see picture above. I made mine about two inches tall and ten inches long). Place on the prepared baking sheet.

3. Bake in the hot oven for 20 to 25 minutes, or until the dough is firm to the touch. Remove from the oven and let cool completely. When you remove the log, also turn your oven down to 275°.

4. When the dough is cold, use a serrated knife to cut the dough into about 20 slices about 1/4 inch thick.

5. Place the biscotti slices on a fresh baking sheet and bake them in the warm oven 30 to 40 minutes, turning once, until they are very dry. Remove the biscotti from the oven and let cool completely. Enjoy!

Adapted from: The Big Book of Chocolate by Jennifer Donovan.


Wednesday, May 16, 2012

Pasta with Grape Tomatoes


If you are looking for a light and tasty pasta dish then look no further! This combination is super flavorful and fragrant, and has a little bit of heat, which I absolutely loved. I'm always looking for new and simple pasta recipes, and after buying grape tomatoes on sale this week, I decided to give this recipe a try. It all comes together as fast as you can cook the pasta, so I think it would be a great meal choice after a long day when you might not feel like cooking. We ate it right after I made it, so it was warm, but it was also good cold. We had a few leftovers, and I ended up eating it later without warming it up.


Pasta with Grape Tomatoes

1/4 cup olive oil
1 garlic clove
1/2 pint grape or cherry tomatoes
1/4 teaspoon red pepper flakes
Salt to taste
1/2 pound dried pasta
1/4 teaspoon dried oregano
Parmesan cheese, to serve

1. Bring a large pot of water to a boil and cook the pasta until al dente.
2. Meanwhile, slice the tomatoes in half and set aside. In a large frying pan, heat the olive oil and the garlic over medium heat until the garlic in light brown. Next, add the tomatoes, the red pepper flakes, and the salt. Sauté until the tomatoes are soft, about 5 minutes
3. Drain the pasta and add to the sauté pan with the tomatoes. Add the oregano and toss to completely coat the noodles.
4. Seve with Parmesan cheese sprinkled on top. Enjoy!


Adapted from: The Italian Chef


Friday, May 11, 2012

Grandma Lillian's Cinnamon Rolls

People ask me all the time where I got my love for cooking. I sometimes have trouble knowing how to answer that question. Food has always been just a part of life. Most of what I know I learned from my mom and my grandma. Both of these women did what they needed to do on a daily basis to keep hungry people satisfied and well fed out on the Nebraska plains. Making good food was just what they did everyday, and it is still that way.

All that brings me to Grandma's cinnamon rolls. We always called them cinnamon rolls, but they are actually sticky rolls. Although I like an occasional cinnamon roll with frosting, this is really my favorite way to eat these cinnamon rolls. They are best warm with a little bit of butter and a cup of coffee at Grandma's kitchen table around 4:00 in the afternoon. Good ol' Nebraska coffee and cinnamon roll time. My grandparents and I could sit around for hours this way, just talking and telling stories, and eating cinnamon rolls. Grandma would even keep some in the freezer so that she could heat them up at a moments notice if we happened to stop by.

This recipe really makes a lot of cinnamon rolls. I usually use two 9x13 or 9x15 cake pans or a large jelly roll cookie sheet. How many cinnamon rolls you have will depend on how thick you cut the dough. You might have to adjust the size of the pans you use, so keep that in mind.


Cinnamon Rolls

For the cinnamon rolls:
1 cup milk
1/2 cup butter, margarine, or shortening
2 packages yeast, about 4 1/2 teaspoons
1 cup warm water, (110° to 115°)
3 eggs, beaten
1 1/2 teaspoons salt
1/2 cup sugar
6 to 8 cups flour

8 to 12 tablespoons butter, at room temperature
1 to 1 1/2 cups brown sugar
cinnamon

For the caramel topping:
2 cups brown sugar
4 tablespoons water
4 tablespoons light corn syrup
1 teaspoon vanilla
1/2 cup butter

1. Begin by scalding the milk, or bringing it to about 185° F. You can do this on the stove in small sauce pan or in a glass measuring cup in the microwave. If you do it on the stove, stir constantly to keep the milk from scorching or forming a layer on the top, then remove from heat. Add the butter to the scalded milk so that the butter begins to melt.

2. In a separate small bowl, combine the yeast and the warm water and let stand for several minutes, until the yeast is softened. In another separate medium bowl, whisk together the salt, sugar and 3 cups of the flour.

3. Combine the milk mixture, the yeast mixture and the eggs in a large mixing bowl. Add the flour mixture all at once, and beat with an electric mixer until smooth. Continue to mix with a wooden spoon and add 3 to 4 more cups of flour a little at a time until the dough starts to take shape and is only slightly sticky.

4. Next, knead the dough on a well floured surface for about 5 minutes. If the dough is too sticky, add more flour, but be careful not to add too much more. Add a little at a time and keep in mind that the dough will be a little sticky. When the dough has been kneaded, transfer to a clean bowl that has been lightly oiled. Allow the dough to rest in a warm place until doubled in size, about 1 hour.

5. While the dough is rising, make the caramel sauce for the rolls. In a medium saucepan, combine the brown sugar, water, corn syrup, vanilla and butter. Bring to a boil over medium to medium-high heat, stirring constantly. Allow the caramel to boil for one minute, then remove from the heat. Pour immediately into the bottom of two 9x13 or 9x15 cake pans. You can also make the rolls in a jelly roll pan or round cake pans, if desired.

6. When the dough has doubled in size, punch it down gently and divide the dough in half. (If you have limited counter space, you might want to divide it into thirds.) Roll out one section of the dough into a large rectangular shape on a lightly floured surface until about 1/2 inch thick. Take 4 to 6 tablespoons of the room temperature butter and spread it over the dough. Next, sprinkle with half of the brown sugar, then sprinkle generously with cinnamon.

7. Starting with the end closest to you, begin to roll the sheet of dough away from you until you have one large roll. Make sure the seam side of the dough is facing the counter, then you are ready to cut the cinnamon rolls. Cut the large roll of dough into approximately 2 inch pieces with a sharp knife or a piece of string or thread. If using the sting or thread, slide the string under the dough, then bring to the top and crisscross. The string allows you to make clean cuts without smashing the dough.

8. Set the rounds of dough in the pans with the caramel sauce. The dough should be set slightly apart in the pan. Repeat with the remaining half of the dough. Cover and let rise in a warm place for about 30 minutes or until doubled in size.

9. Bake in a preheated oven at 350° for 30 to 35 minutes or until golden brown. Allow the rolls to cool for a few minutes, then flip onto a heat proof tray or cookie sheet. Slowly remove the cake pan and allow the caramel rolls to cool. Enjoy!

*Note: Since this recipe makes so many rolls at once, you can also put a pan in the freezer if you do not want to bake them right away. After cutting the rolls and placing them in the pan, cover them well with plastic  wrap and foil and put them in the freezer. I usually get them out of the freezer to rise about 4 hours before I want to bake them.

Tuesday, May 8, 2012

Blackberry Sorbet with Mascarpone Cream

I am not usually a very big fan of ice cream, but I usually like frozen desserts. Because of this, I decided that homemade sorbet was designed just for me. Plus, there are few fruits more amazing than blackberries. I was mostly drawn to sorbet because I found out that you can make it without an ice cream maker by using your freezer and a food processor. We have an ice cream maker, but it's one of those that needs ice and salt, and is best used outside where a mess doesn't really matter.


This sorbet turned out sweet and creamy, and since I had the stuff on hand, I made a mascarpone cream to dollop on the top. The combination was divine. The sorbet was still excellent without the cream, but I thought that it balanced the tartness of the blackberries perfectly.


Blackberry Sorbet
1 cup water
1 1/4 cup sugar
1 lb. (16 oz) blackberries, fresh or frozen
2 tablespoons lemon juice
small handful blackberries for garnish, if desired

Mascarpone Cream, if desired
1/2 cup whipping cream
1/4 cup mascarpone cheese
2 tablespoons sugar

1. If you are using frozen blackberries, set them out to allow them to thaw.

2. In a small sauce pan, combine the sugar and the water. Bring to a boil, stirring occasionally, until the sugar is completely dissolved. Set aside to cool. To quickly bring the temperature down, you can also put this syrup in the fridge or the freezer for a few minutes to cool it.

2. Place the fresh or thawed blackberries in a food processor or a blender. Process until pureed, then add the chilled sugar syrup. Press the mixture through a large mess sieve to remove the seeds. Stir in the lemon juice.

3. At this point, you have two options. You can freeze the sorbet in an ice cream maker, but if you don't have one, you can do it by just using your freezer. If using an ice cream maker, chill the mixture thoroughly then proceed as you normally would with the ice cream maker.

If you are using your freezer (which is what I did), then put the blackberry mixture in a stainless steel bowl or pan. Cover the bowl with plastic wrap and allow it to freeze for 1 to 1 1/2 hours, or until the mixture is firm around the edges and still slushy in the middle. Transfer the sorbet to a food processor and process until the mixture is a uniform slush. Put the mixture back into the stainless steel bowl and into the freezer for another 1 - 1 1/2 hours. Repeat the process a least two more times at the same time interval.

4. Freeze the sorbet in your freezer for at least an hour before serving so that it has the chance to firm up.

5. If using the mascarpone cream, make it while the sorbet is in the freezer. Combine the mascarpone, the heavy cream and the sugar in a medium bowl. Beat until soft peaks form using a whisk or an electric mixer. Top dishes of the sorbet with the mascarpone cream. Enjoy!

Adapted from a recipe at the Joy of Baking website.

Sunday, May 6, 2012

Easy Cinnamon Sugar Donuts

While we were dating, I remember my husband one time announcing that we needed to make donuts. Since I make pretty much everything from scratch, the long ordeal of making donuts and letting them rise, and frying them, and frosting them and everything else in our tiny dorm kitchen did not really seem like that great of an idea to me. He, however, had a short cut and I was blown away at how tasty and easy these donuts are! Yes, it is cheating just a little, but they are still fun to make. It has been several years since we had made them, and the other day we decided it was time. They turned out even better than I remembered. It was a perfect quick Sunday morning breakfast before church.

My husband usually used the lid from something to punch out the center because back in the dorms, we never had anything like a small biscuit or cookie cutter. Well, unfortunately, I still don't, so this time I tried the large pastry tips I have. A single punch left too much for the whole donut, but I discovered that three punches worked great. Plus, they left a cute little clover shape in the middle of the donuts. And the donut holes were the perfect size! Next time I might make only donut holes. Of course, they are so easy to pop in your mouth that I would probably eat them all... which is not a good thing!


Cinnamon Sugar Donuts
Makes 8 to 10 donuts plus donut holes

1 tube refrigerator biscuits, such as Pillsbury. We usually get the jumbo buttermilk kind.
oil for frying
1 tablespoon cinnamon
1/2 cup sugar

1. Heat the oil over medium heat to 350° in a large stock pot or dutch oven. Use a candy thermometer to monitor the temperature, if you have one.

2. In a bowl, combine the cinnamon and the sugar and stir until mixed. Set aside.

3. Open the biscuits and lay them out on a cookie sheet. Using a small round cutter, a large pastry tip, or the lid from a spice jar, cut circles into the middle of each of the biscuits.  Make sure the circle is large enough that the donut is about one inch all the way around.

4. Fry 2 or 3 donuts at a time, depending on the size of your pan. The donuts should take 1 to 2 minutes on each side. If the oil is too hot, the donuts will brown too quickly and the insides will not be cooked. Once they are golden brown all the way around, move them to a plate covered with paper towels to drain. Repeat with the remaining donuts and donut holes.

5. While the donuts are still very hot, turn them in the cinnamon-sugar to coat all sides. Stack them on a separate plate and serve immediately. Enjoy!


Friday, May 4, 2012

Klitharaki

You may be wondering what on earth this post is about. If the title sounds Greek to you, then that's great because it is! My brother-in-law Bennett just graduated from high school and to celebrate, the whole family went out to eat an all Greek restaurant, which has inspired me to experiment with some Greek cuisine. I didn't think I really liked Greek food, but the dinner we had was phenomenal and I am excited to see what new recipes I can make in the near future. One of the side options at the restaurant we went to was a dish called "Klitharaki." Basically it is orzo pasta cooked in a tomato sauce and let me tell you, it was awesome! It was warm and comforting and right after I decided to make it myself sometime, my husband leaned over and told me how much he loved it also. That officially made up my mind.

After doing some research, I found out that klitharaki is the Greek name for the little pasta. There seem to be quite a few variations, but I was mostly interested in the savory tomato type that we ate the other night. This recipe is adapted from a different assortment of recipes that I found, but mostly came from here. We happened to make it on a windy, cold day and it was perfect.


Klitharaki, or Orzo in Tomato Sauce
Makes 4 to 5 servings

1-2 tablespoons olive oil
1 tablespoon butter
1/4 cup finely chopped onion
1 medium clove garlic, minced
1 8-oz. can tomato sauce
2 tablespoons tomato paste
3 1/2 cups water
1/2 pound orzo pasta, uncooked
1/2 teaspoon salt
1/4 teaspoon pepper
1 bay leaf
1/4 teaspoon oregano
1/4 cup Parmesan cheese

1. Heat the oil and butter over medium heat in a dutch oven or a large stock pot. When the butter has melted, add the onion and cook for several minutes, until the onion is tender and translucent. Then add the garlic and cook about 1 more minute. Make sure that the onions and the garlic do not brown or burn!

2. Then add the tomato sauce and the tomato paste. Continue cooking for about 5 minutes. Next add the water and the orzo. Give it a stir to make sure nothing is sticking, then add the salt, pepper, bay leaf, and oregano. Give it another stir and reduce the heat to medium-low.

3. Cook for about 45 minutes, or until the pasta is tender. Make sure to stir the pasta often to prevent it from sticking on the bottom of the pot. If the mixture seems dry and the pasta is still not cooked, you can add a little more water, but make sure not to add too much!

4. When the pasta is al dente, add more salt and pepper if necessary and remove the bay leaf. Add in the cheese and cook for a few minutes more so the cheese has a chance to melt.

5. To serve, top with more cheese, if desired, and some warm toasty bread. Enjoy!